General
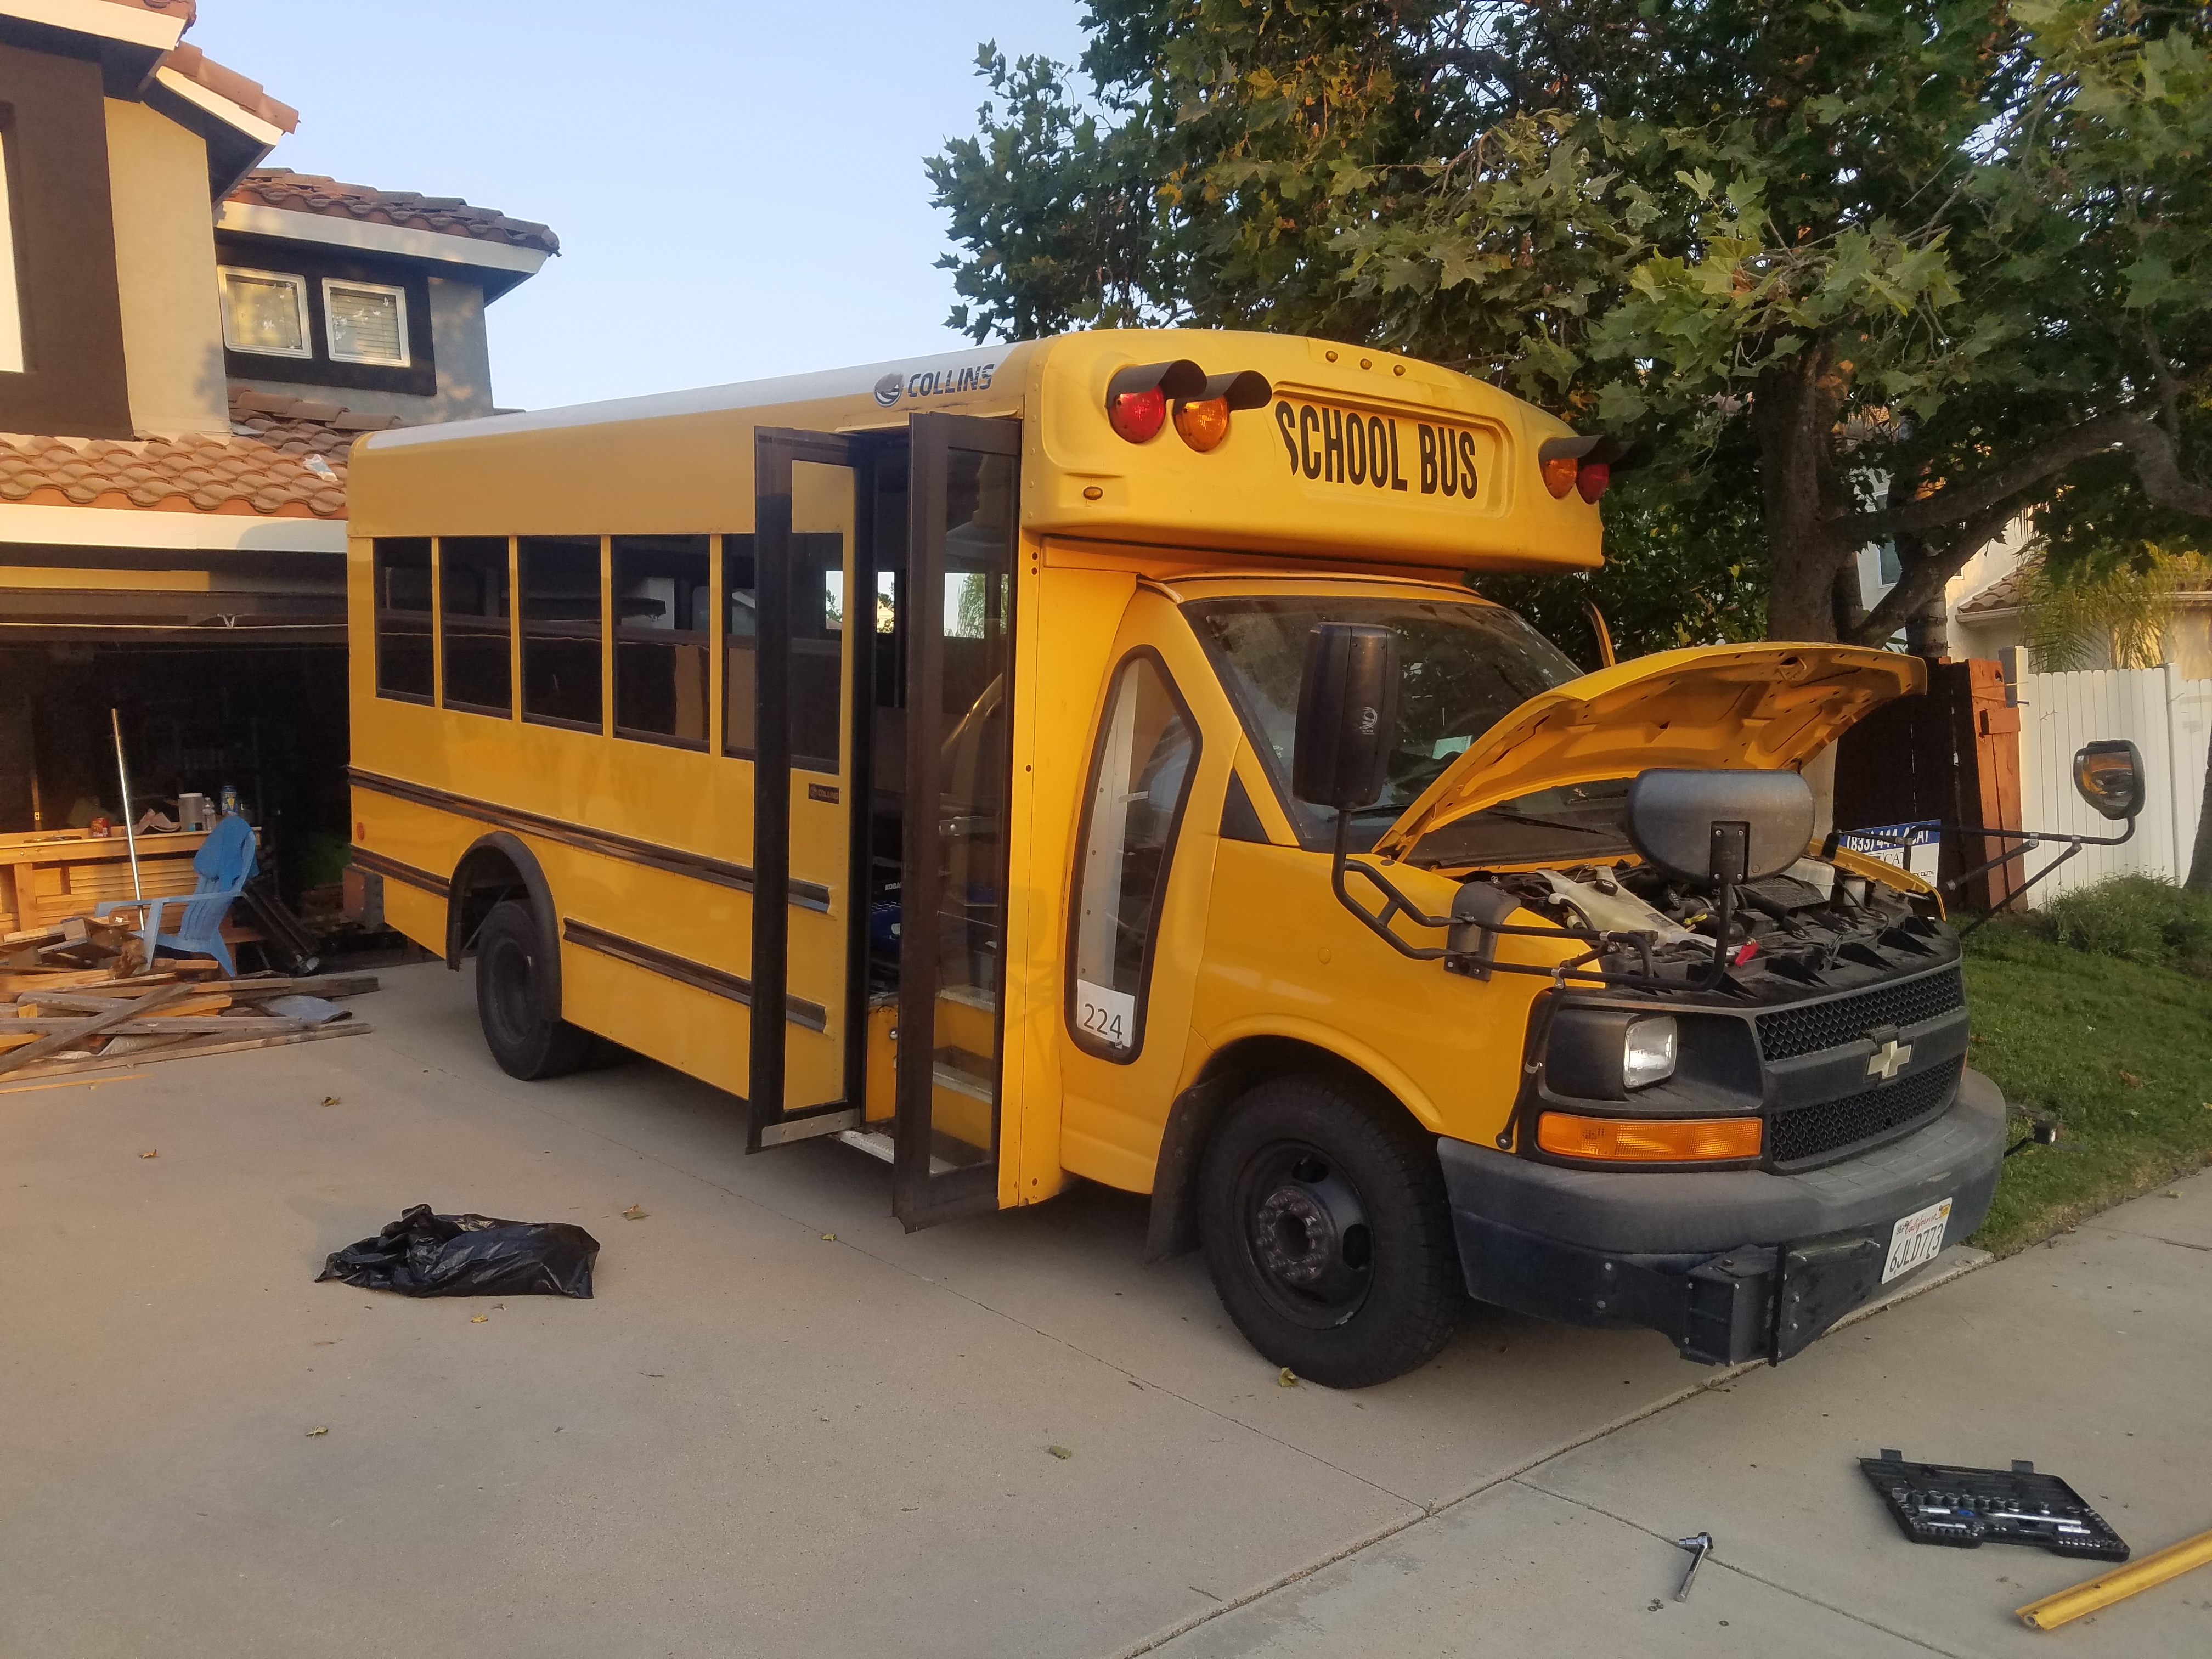
Hey there. This is my journey about me buying my bus and my attempt at turning into an RV kinda thing. My thoughts about this started when I when my dad was offered a chance to buy his neighbor's RV for 20k. To me that seemed crazy expensive but the thoughts of having a small home on the road to travel in, and being a shelter anywhere was really intriguing. I saw a few problems with motor homes though that made them really unnatractive
- A lot of spaces is wasted on bulky kitchens. Who really needs an oven on the road?
- When buying used, needed repairs can go easily unnoticed and every time you check a new RV it would cost at least $100 to have someone go through and check just the engines and body of the vehicle.
- Sewage, gas lines, and wiring were my biggest fears of the above point. These three need to be maintainted as well, and they aren't really things I need in the first place
- RV's in general are expensive. Either you buy new and realize you could have bought a house with that money or you buy used and risk spending thousands fixing and maintaining and storing it (most storage places nearby cost at least $100 a month to store RV's)
So basically what it came down to was: RV's are expensive, risky to buy, and very inneficient in their design/space. I don't need a kitchen, I don't need a big shower/bathroom, or even a seperate room for a bed. And each of these things just add to cost in many ways. So rather than get an RV with my dad, I was able to buy a bus for myself
Specs
| Brand | Chevy |
|---|---|
| Make | G3500 |
| Year | 2009 |
| Miles | 142k |
| Engine/Fuel | 8L Vortex Gasoline |
| Milage | 10 MPG (for now) |
| Class | Auto (fortunately not registered as RV or Commercial) |
| Cost | 5k |
| Length (Outside) | 24ft |
| Interior Dimensions | 13ft Long, 7ft Wide, 6'6" Tall |
To Top
Day 1
Aug 2nd 2020Today was my first day after buying the bus. My friend Justin and I decided to start gutting the thing. I really didn't own any tools before this so I went to Harbor Frieght and bought loads of cheap tools. This was reccomended to me by a few people as it's a good way to get started and figure out what you really need before you invest in expensive tools. This really was a good idea because I totally ruined a few sets of plyers because they got covered in tar from the underneath of the bus, and so far only quality tools I feel like I need are socket wrenches.
Obviously the best place to start of was the seats. There are 6 rows of seats in
the bus and they take up all the room. The left side was all 3 person seats and the
right was 2 person seats. So enough room for about 30. The seats were held to the walls
with 3 heavy screws, bolded to a rail, and they were also held to the floor with 3 or 6
bolts through the floor of the bus, depending on if it was a 2 or 3 seater. There were 2
big problems with this.
The ones bolted to the floor went all the way through the floor, and had a nut on
the bottom side of the bus, meaning someone had to go underneath and hold the nut while
the other unscrewed from above. This lead to my two problems
a) Some nuts underneath were literally unreachable. Some were
above the gas tank, or surrounded completely by other parts.
b) The bottom of the bus had a layer of tar coating underneath
to help prevent rusting. This made it 10x harder to unscrew the bolts as the threads were
filled with tar
Today we only really had to deal with the tar, but we knew the unreachable nuts were soon
in our future. This was our first day and we were doing all this by hand. We had small
and large socket wrench, and a pair of plyers, that was really it.
The Process
We did everything by hand. each bolt required at least 400 pounds of force. We had a foot
long ratchet and we could stand and stomp on it and not move. We almost an hour just trying
different niave methods of trying to force it, and we were able to get 2 seats off in like an
2 hours + breaks. Hand cranking through the tar and mad force could only get us so far.
Eventually we got to a seat where, no matter what we tried, we could
not get anything to budge. We enlisted my neighbor Steve, a cool guy who has every kinda tool.
he gave us a blowtorch and liquid wrench to help. This worked amazingly. We got another seat or
2 before we found a new poroblem.
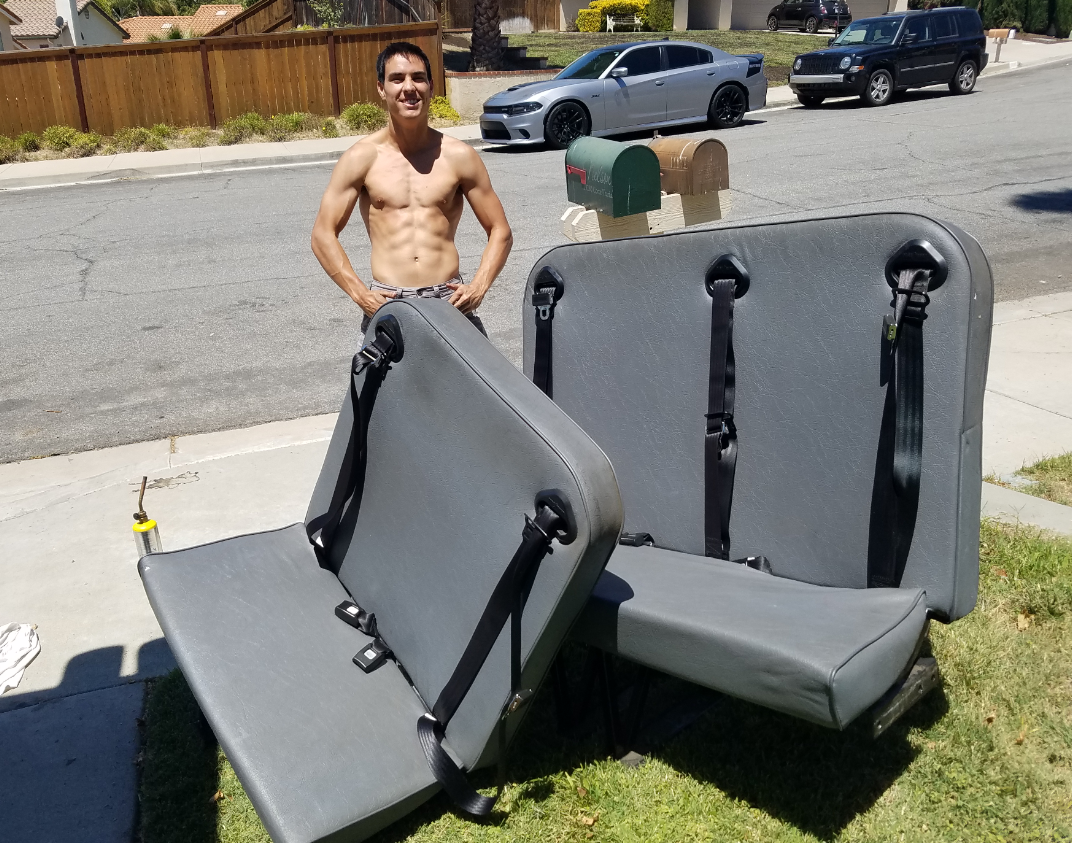
My bud Justin, standing proud above the first 2 seats we removed
Some of the bolts holding the seats against the wall were about 4 feet
deep in between two sheets of metal, the bottom of the seat and the tire well (a big hill
in the floor that covers the tire)
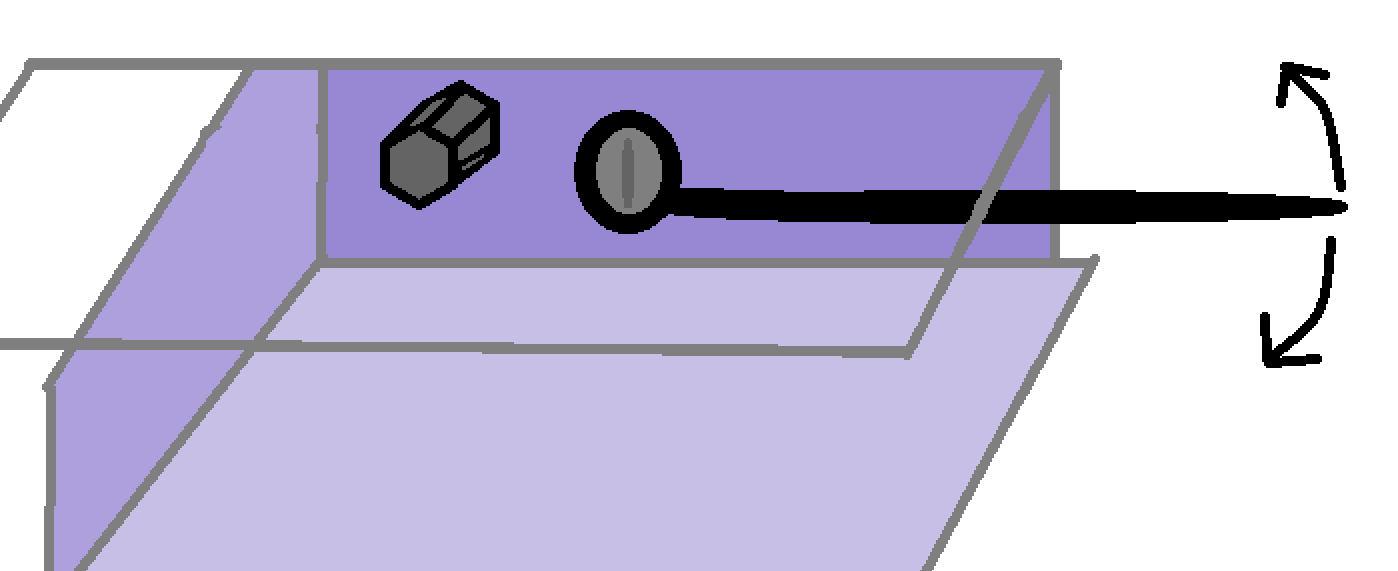
From the poorly drawn image above, you may be able to see our problem. We could only reach the
nut from the side, but you only had like 10 degrees to move the ratchet, which wasn't enough for
a click. We even tried about 2 feet worth of socket extensions to try and get better angles and
even that didn't work. So what did we do? Brute force
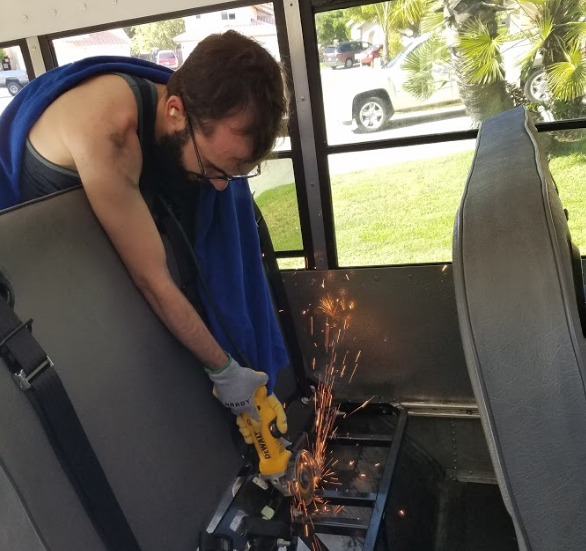
We knew we needed a new angle so we just used and angle grinder to make one. You can see the
final cut and us breaking it off with satisfaction with video here:
YouTube Link It was
fun cause I hadn't used an angle grinder in a few years since Robotics, and this one was much
stronger. After we finished the cut, we gave the nuts an unsuccesful shot, and called it a night
since we were worn out.
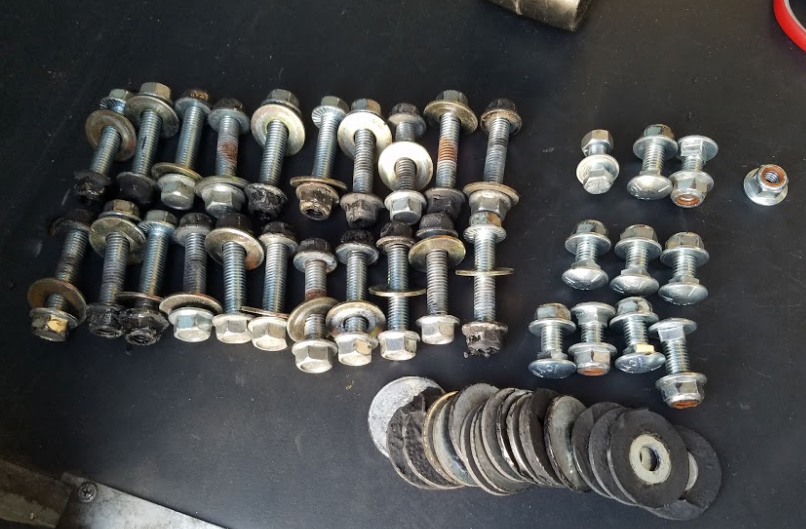
All the bolts removed today
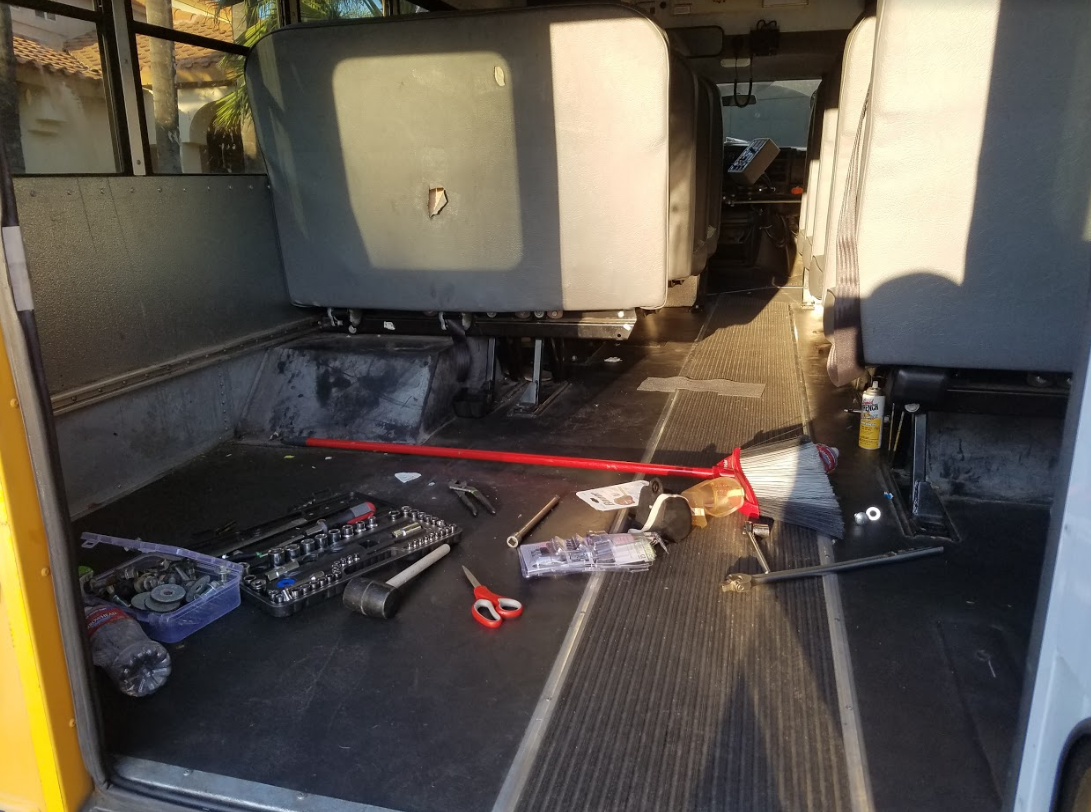
The bus with 3 full seats removed, and 2 others partially removed
Day 2
Aug 4th 2020Today started off basically identical to the previous day, with the same intentions and goals as well. We thought we could apply the same methods to finish getting rid of the rest of the seats but we were wrong. While we are now able to get any of the side nuts off, we found a new problem with the floor nuts
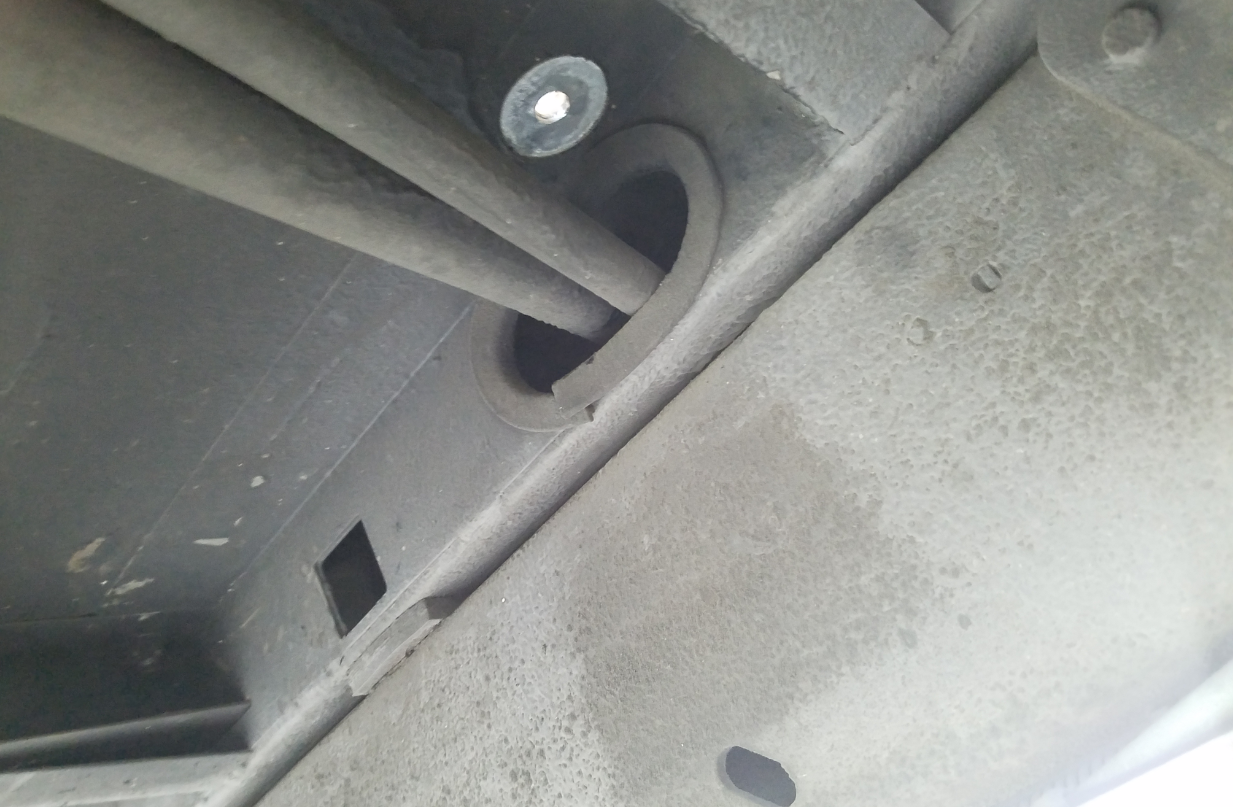
This was out only access point to reach the bottom of one of the floor nuts, this tiny hole
Some nuts were completely covered on the bottom, like this one. We had no way to get a ratchet or even pliers on it so someone on top could spin it. Things like the gas tank and the frame of the bus were in the way, and we didn't really have the means to change or move anything. So we once again resorted to the good ol' Brute Force method
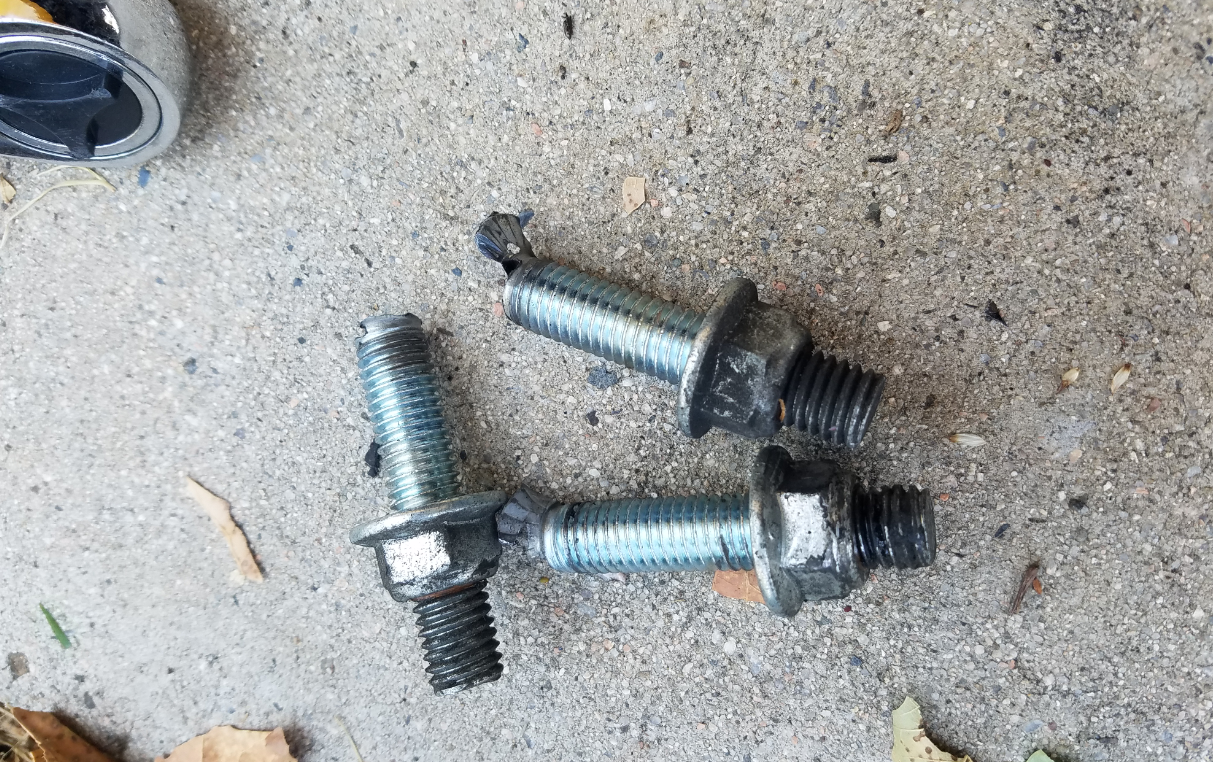
With an angle grinder and our COVID masks, we were able to get the rest of the floor nuts off without a hassle just by slicing the top off like this.
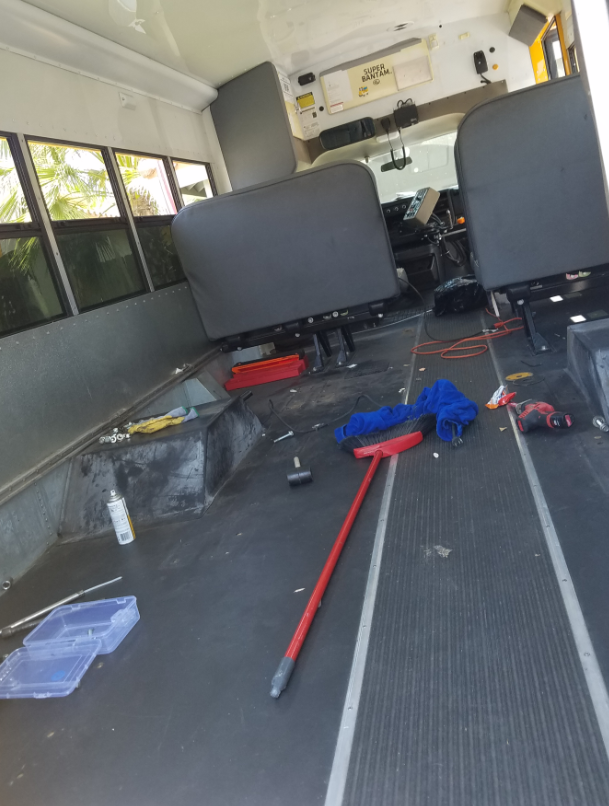
We continued this method till we got all but a few seats out. I purposely left them in so I could legally ride with people
After we got the seats out we spend like an hour or two cleaning, it was really a mess. Layers of gum, sweat, and who knows what else was splattered all over the floors, windows and all crevices of the bus. The pic above is from an 'after' shot of most of the cleaning,
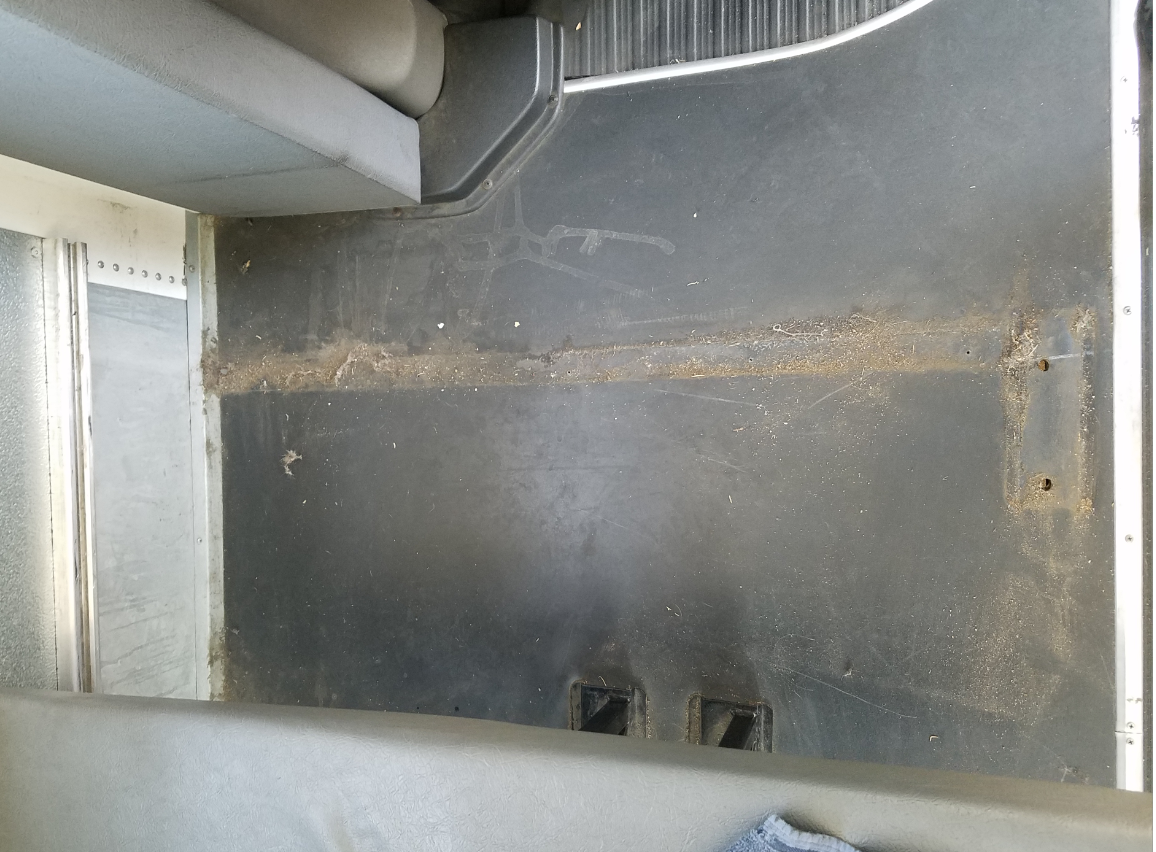
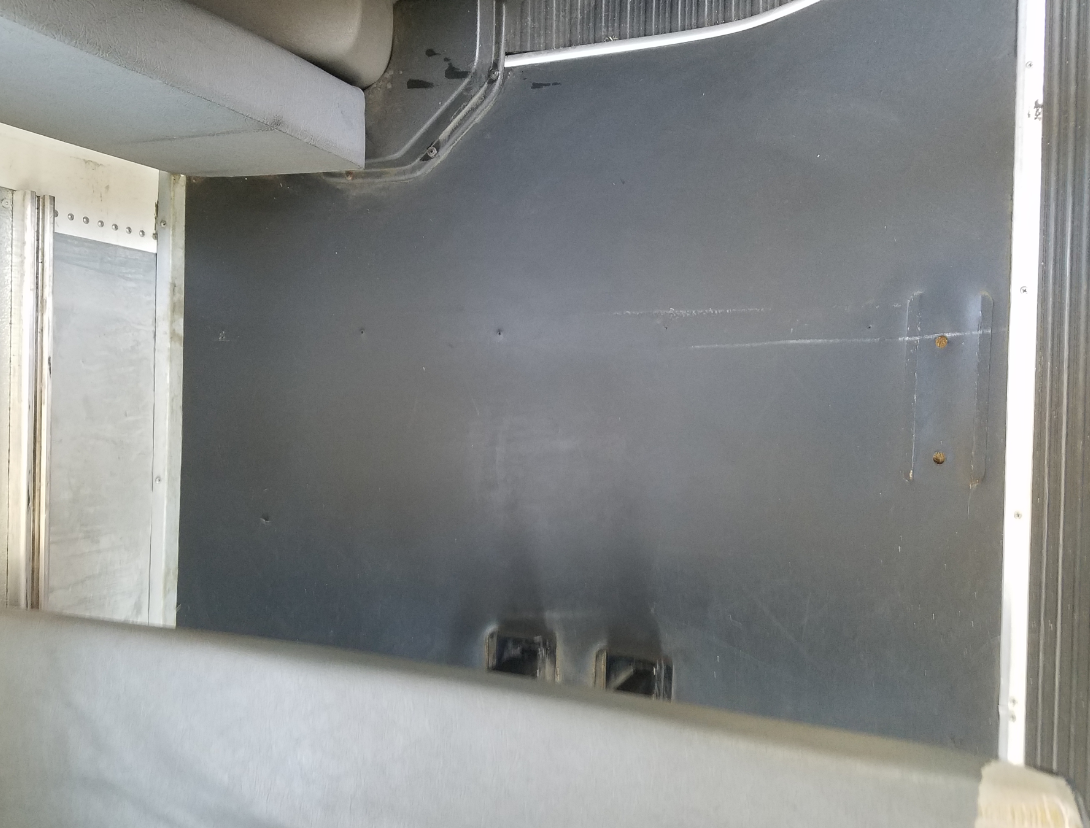
While it may just look like dust, most of it can't be swept, this is a before and after deep scrubbing layers of filth
After that the day was basically over. We spent hours cleaning and removing the seats. This allowed me to get a much better idea for how much space I have and what I want to do with it all. Though the biggest and hardest parts were still ahead, wiring and power.
To TopDay 3
Aug 20th 2020Day Three
.
.
.
.
.
.
.
.
.
.
Day 4
Aug 22nd 2020Day Four
.
.
.
.
.
.
.
.
.
.
Day 5
Aug 25th 2020Day Five
.
.
.
.
.
.
.
.
.
.